Last semester, I taught a brand new class, Alternative Process Photography, for the first time. The class was great fun to teach, and the students who enrolled enjoyed it as well. We worked on scanographs (using flatbed scanners as cameras), cyanotype prints, Van Dyke brown prints, instant film lifts and transfers, and explored mixed media work incorporating alternative process photography.
There was another process which we tried, that to be honest I was unsure about. Blue Van Dyke (BVD) printing involves combining the cyanotype and Van Dyke brown processes in the same print. This is usually considered near impossible, as the chemistry used to produce both those processes are incompatible and will ruin the print if combined. I was browsing through The Book of Alternative Photographic Processes by Christopher James (a really good book for those interested in these processes) looking for something I could use as a class assignment, and discovered a chapter on the BVD process, which I had pretty much ignored in my previous readings of that book.
The process looked pretty simple, so I ran a couple of quick test prints during class to see how well it worked. Basically, you print the cyanotype layer first, but give the print twice the exposure as usual, which overexposes the print. For the Van Dyke layer, the Van Dyke chemical solution is diluted 50% with distilled water, and this layer is also given double the exposure time. The Van Dyke solution bleaches the cyanotype layer quite a bit, but the fact that it’s overexposed keeps it from completely disappearing. FIxing isn’t recommended, as it ruins the cyanotype layer, but to not fix the prints means the Van Dyke layer will change if it is exposed to light. I worked around this by briefly immersing the prints in a highly diluted sodium thiosulfate (fix) solution. It did bleach the cyanotype, but not much.
The first print (at the top of this post) is a standard BVD image. I wasn’t paying close attention when I printed the Van Dyke layer, and the negative was out of registration, but it looks good that way. For my second test, I found an old transparency used as an illustration for a 2D Design lecture in my file cabinet, and made a print of that:
I masked the edges of this print after the cyanotype layer, to retain the deep cyan tone around the border. I also flipped the transparency when printing the Van Dyke layer, just to see what would happen. Unfortunately, I left it in the fix too long and the Van Dyke layer bleached out. I printed that layer a second time, but that caused the cyanotype layer to bleach more. Still, not bad for a test print.
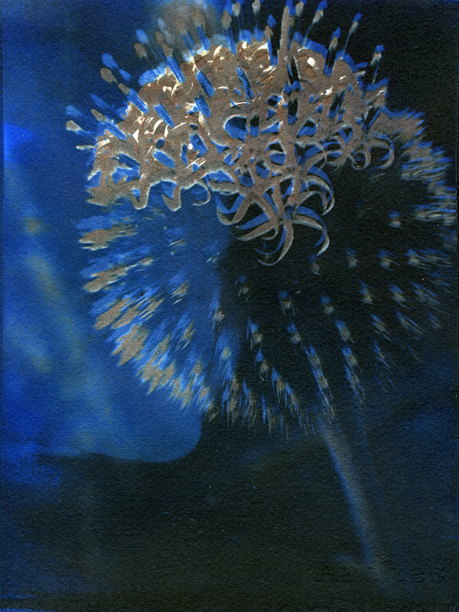
This print was made by exposing a cyanotype print without a negative, resulting in a solid blue. I coated the Van Dyke solution over it, and exposed it using a transparency. It’s a little dark, but I like how it looks.
With several test prints turning out successfully, I decided to try a BVD assignment for my class, figuring that if it didn’t work, at least it wold be a reminder of the sometimes unpredictable nature of archaic photographic processes.
It turned out to be an interesting assignment. While not every student got good results, several did.
These BVD prints are the work of Anthony Cox. Both of these images started as scanograms (he really took to scanograms and made some great ones) which were printed onto transparency and used as negatives. Anthony has a really interesting blog which you should take a look at.
Kevin Jaderberg made the following two prints. Both are made from the same image of a trash can, fence and shadows. With both of these prints, the negative was flipped when printing the two layers (similar to what I did in the second test print posted above). I really like the lines in these prints.
I’m not sure if I’ll have a BVD assignment when I teach this class again next Fall, but I’m pretty sure I’ll be incorporating it into my own work. It's fun, easy, and allows for a lot of experimentation.